For most of the last decade I’ve been running a headless Mac Mini with a large external drive to run my Plex server and a few other services. Recently I’ve started playing with Docker and it’s really made the Mac Mini start to show its age.
I briefly looked at the “current” Mac Mini’s but when I saw they start at £800 and haven’t been updated since 2018 I hastily looked elsewhere. I considered building my own server but found myself getting carried away by massively over-engineering a system.
A little more research lead me to look for a Dell PowerEdge T110 II. They aren’t pretty or particularly modern but they are plentiful, cheap, quiet and capable. I picked up one with a Quad Core 3.5GHz Xeon (E3-1270 V2) and 16Gb RAM for £120 on eBay.
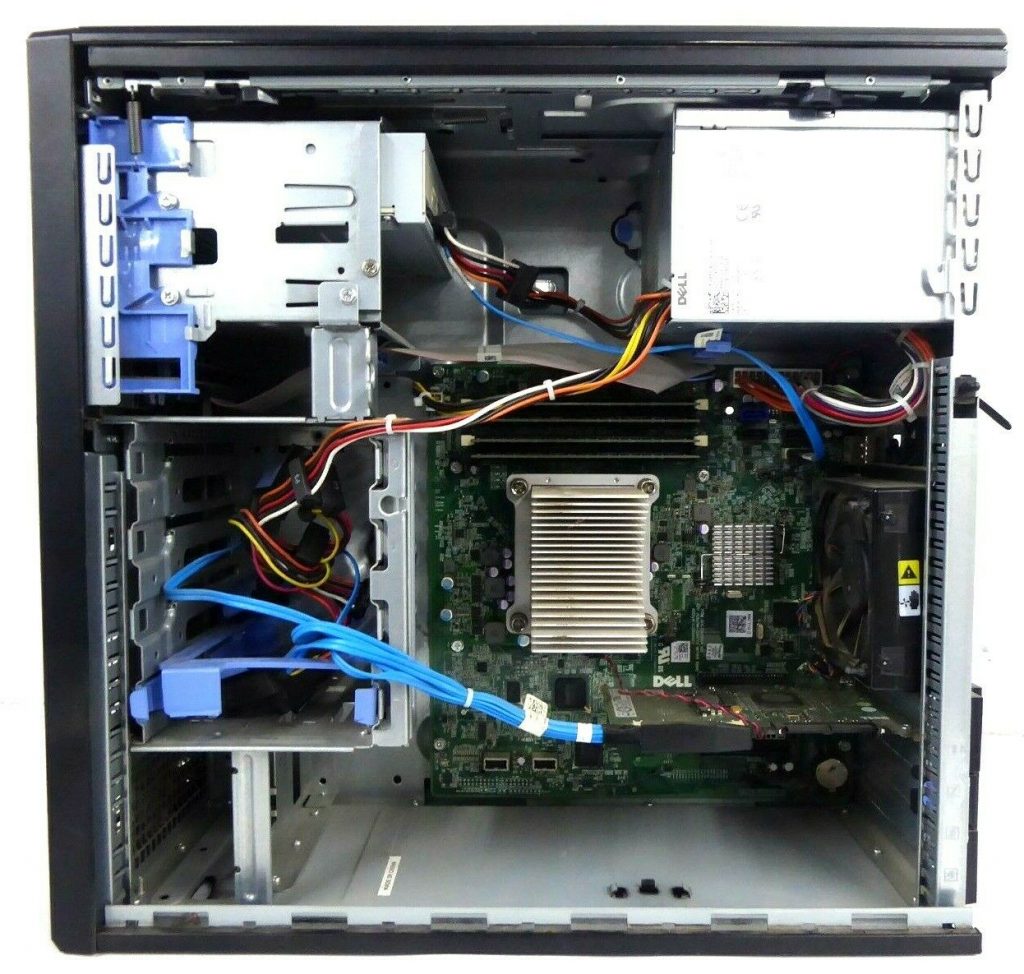
As you can see in the picture above it has four 3.5″ drive bays plus two 5.25″ bays, one of which comes pre populated with an optical drive. My machine also came with a Dell RAID controller card which I won’t be needing for this project.
Enter unRAID
There were a variety of options I could have chosen to set up this old server as a network attached storage (NAS) device and Plex server. I could have used Windows, I could possibly have made it a hackintosh to run Mac OS or I could have used any of the various flavours of Linux.
I decided on unRAID because it’s a very simple solution for taking a computer with a bunch of drives and making them available over the network with minimal set up. It has an excellent community with posts in the forum to cover any number of issues, plus clear and concise video tutorials. It’s not free or opensource but it’s less than £50 to licence it on a machine with up to six drives.
For me one of the big selling points was that unlike a regular RAID array you can mix and match drives of various sizes (the largest of which will generally be used for parity) and you can add more drives to your array at any time. This allows me the flexibility to upgrade the drives in my array as the cost of drives decrease over time.
Putting it all together
I replaced the RAID card with a cheap PCIe SATA card that provides four additional SATA ports on top of the four on the motherboard. I then looked into which hard disks to use for my unRAID array, settling on 4TB drives as they worked out the best cost per terabyte (£17.75/TB). I bought external WD Elements drives and then prized the drives out of them as it worked out 30% cheaper to do that than to just buy the bare harddrives on their own.
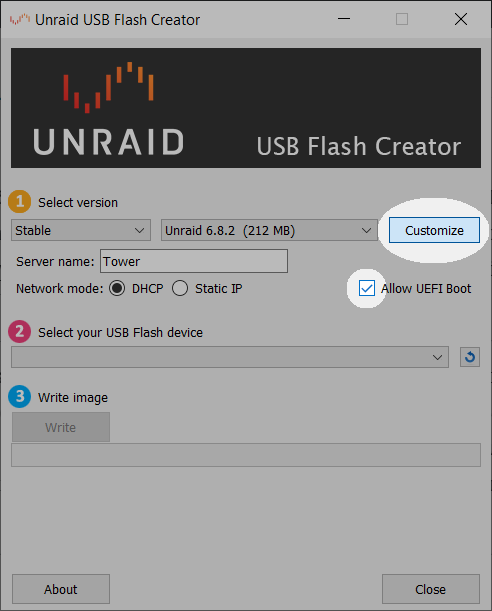
I disconnected the SATA cables from the optical drive and used the two power connectors for the two SSD drives. I tucked the SSDs into the empty bay below the optical drive, I’m sure there’s a better way to mount them but this machine is never going to move, so it should be fine. I installed my four harddrives into the caddies, inserted them in the bays and hooked them up to the PCIe SATA card. Then I used the unRAID USB Creator on my laptop to make a small USB Drive bootable and inserted it into the port on the Dell’s motherboard. As the machine only has VGA out and I don’t have access to any VGA displays I also had to buy a VGA to HDMI adapter.
Ready to launch
With it all loaded up and connected to an ethernet cable, a monitor, keyboard and power I excitedly powered it on. It booted to the BIOS and then defiantly showed a blank screen. I spent about an hour trying various configurations of the settings in the BIOS menus. Eventually I figured out I had to remake the unRAID USB boot drive, so that I could enable UEFI under the Customize button. Having made the UEFI boot drive and setting the Boot Mode to UEFI in the BIOS, everything launched as expected an unRAID was up and running.
With it running I configured the two 1TB SSDs as a cache pool and the four 4TB harddrives in the array with one of them being used for parity. That means that if one of the 4TB drives fail I can replace it with another and the system should be able to recreate the data that was on the missing disk so in theory I shouldn’t lose any data. I intentionally didn’t assign the parity disk yet though (it’s quicker to transfer your data first) and started the array with just the three regular drives.
I had about 3.5TB of data to migrate from the external drive on the old Mac Mini which took quite a while, around fifteen hours. In hindsight, I probably should have just pulled the drive out of its enclosure and connected it via SATA inside the Dell rather than copy all the data over the network. Once the data was all copied onto the server I stopped the array, assigned the final 4TB haddisk as a Parity Drive, restarted the array and left it to do it’s initial parity creation/check over night, that took about another nine hours.
How did it work out?
The end result is 12TB of storage that’s accessible over my network, in a quiet box that has plenty of compute to run a bunch of applications inside containers on docker. All in, including drives and unRAID license, it came to a couple of hundred quid less than the base spec Mac Mini!
I’m currently using docker containers on unRAID to run my Plex Media Server, Home Assistant and a few other applications and it’s taking it all in its stride. The drives are all well below 30 degrees and the CPU rarely gets above 30% usage.
2 comments
Sasso0101
20th April 2020 at 9:21 amHi, I’m intrested into buying the same PC to use it mainly as a Plex server (max 1 1080p transcode at a time), Home Assistant and web server. How much power does it consume and how loud is it? Thanks in advance for your replies 🙂
Ian
26th April 2020 at 4:58 pmHi,
It’s pretty quiet to be fair, I don’t even notice it’s on. I’m afraid I have no way to measure how much power it consumes though. It works great for all the services you mentioned. Enjoy your tinkering!