Lately I’ve been watching a lot of videos about prop making and cosplay. I’m not sure I’m bold enough to dress up myself but I really like the idea of making amazing looking costumes and props from such cheap materials. Unfortunately living in London means our flat is tiny and there’s no space for a workshop or even a spare room. Fortunately my wife is awesome and she suggested that we take a long weekend off work so that we could scratch our creative itches. Leave was booked, craft shops, builders merchants and toy shops were visited and a number of Amazon orders were made.
My original plan had been to replicate a large rifle from Borderlands 2 using foam and PVC pipe. However after watching Adam Savage’s video where he built a custom Nerf rifle in a day I decided to give it a go.
The first attempt

I picked up one of the cheaper Nerf blasters on sale in a toy shop for under a tenner. It’s called a Strongarm, and it seems pretty oversized for a pistol so I thought it would probably make a pretty cool looking Sci-Fi weapon.
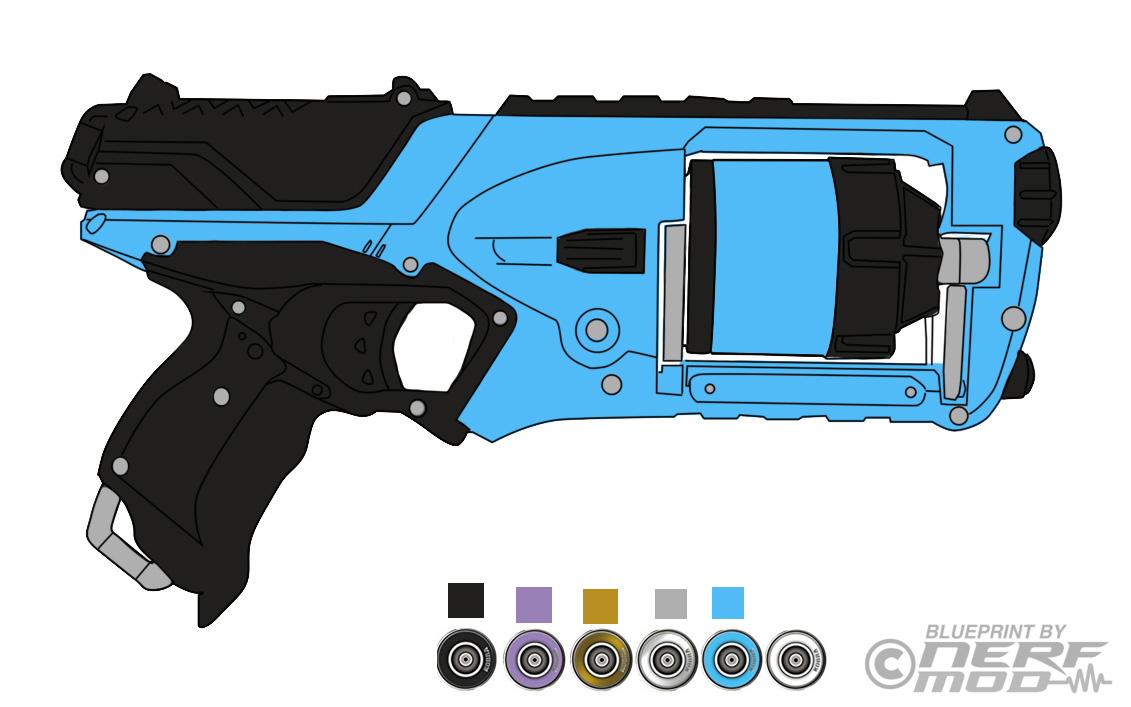
First I had to decide how I wanted to paint it. I found a template on the web, and using a pallet of the spray paint colours I had available planned out the colour scheme. The project finally gave me a chance to use my Dremel so I got to work removing the raised Nerf logo, Strongarm branding and the safety instructions from the blaster. This left the plastic a bit chewed up so I tidied it up with a few different grits of wet and dry sandpaper.
 Next up I disassembled the blaster making sure to take lots of pictures of how the internals fitted together. Then I sprayed the whole thing with a matte black spray paint as a base coat.
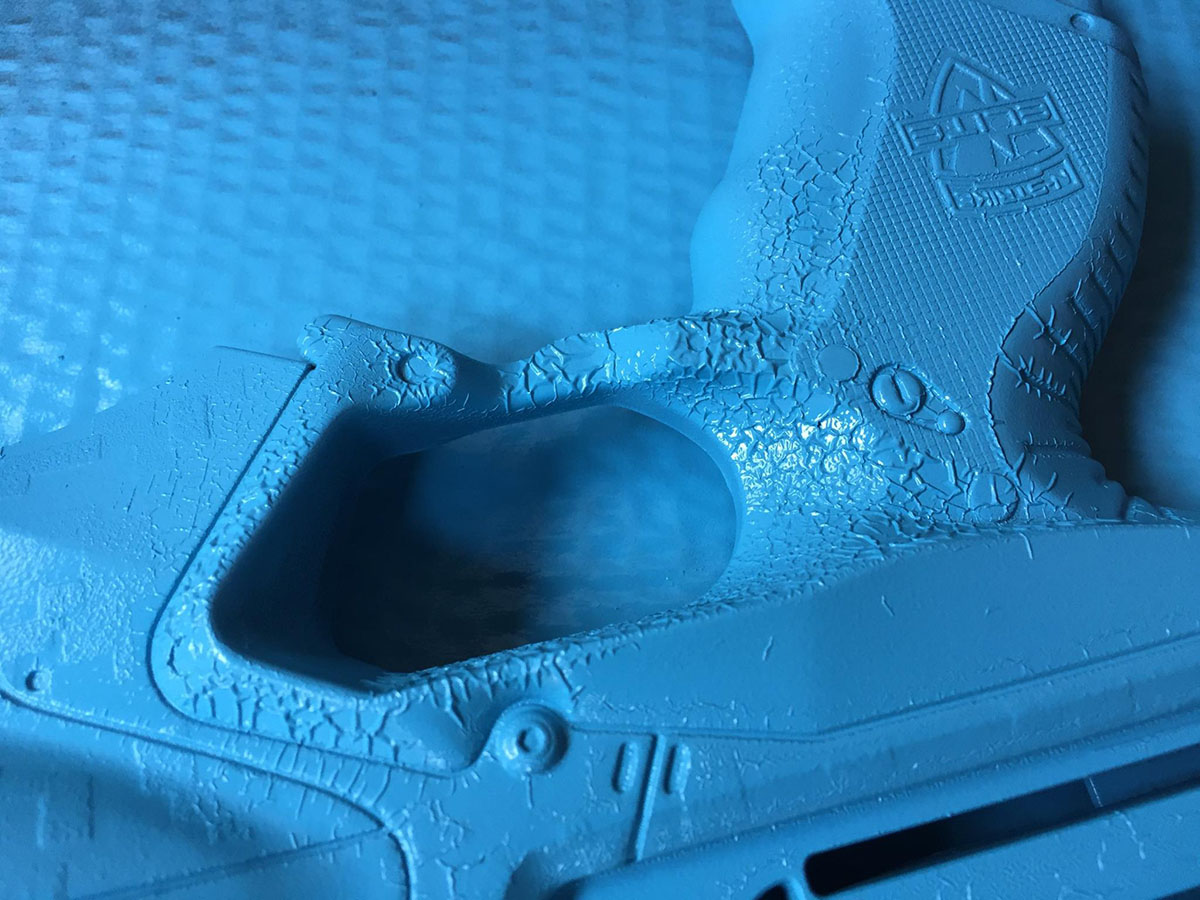 Once it was dry I sprayed the entire blaster with a bright blue spray paint. This is where I hit my first problem. The paint started curling and creating a weird scaly texture. I jumped on to the Facebook group for The PropTarts of Punished Props (a group for fans of the Punished Props YouTube channel) to ask for some advice. Amazingly over thirty people replied to give me advice, what a great community!
It seems the most likely cause was that I had used a solvent based paint for the base layer and the blue acrylic paint had reacted to it. Lesson learned. When it was dry I smoothed out the worst of it with some wet sandpaper and it didn’t look too bad. One of the other suggestions I was given was that spray paint works best if both the can and the surface you’re spraying are warmed up first. So I gently warmed one of the two pieces that make up the slide using a heatgun. It promptly melted and deformed. Second lesson learned. After a bit of heating and bending I managed to get it to fit back on the blaster but it was still pretty mangled.
Next up I masked off the sections I wanted to stay blue leaving only the grip and the “tactical rail” uncovered and sprayed them gloss black. In hindsight I think I probably should have gone with a more matte black but it was beginning to look like my plan.
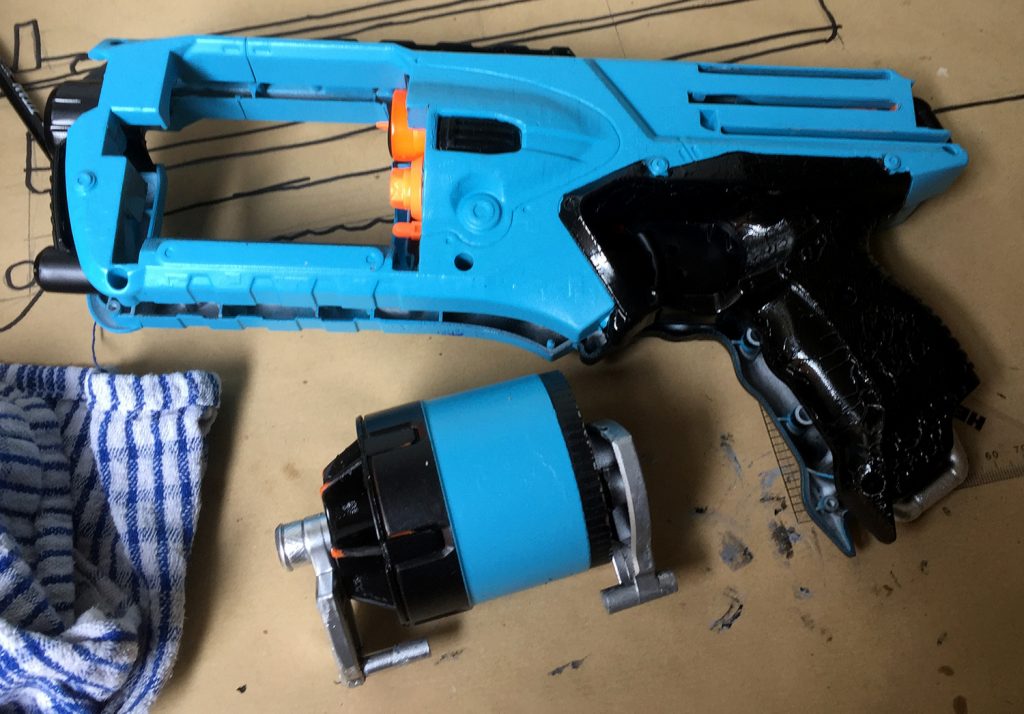
As you can see from the image above I chipped quite a lot of paint off of the cylinder while trying to fit the two halves back together. It took a considerable amount of force to get it back together and in the end I resorted to covering it with a tea-towel and hitting it with a rubber mallet. There’s got to be a better way.
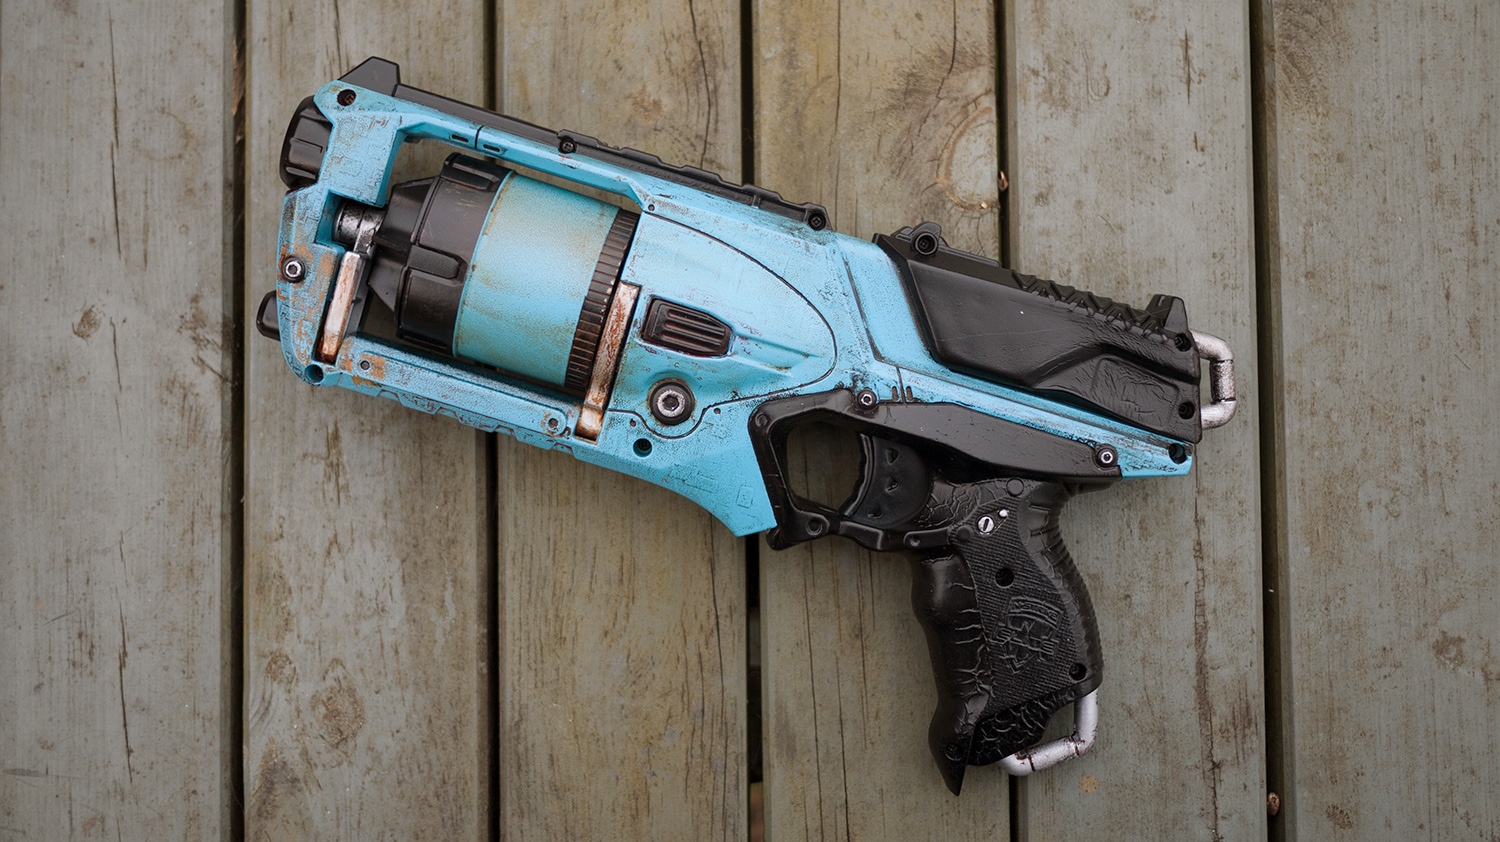
With the blaster reassembled I gave the whole thing a coat of a matte clear top coat. Once it had cured I started work on the weathering, touch-ups and finer details. I was pretty proud of the end result.
The second attempt
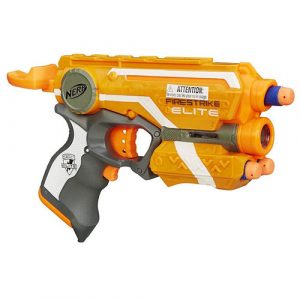
Having discovered what not to do and armed with some actual primer I figured I’d give it another go. So the following weekend I started work on a smaller pistol, a Nerf Firestrike Elite. It’s a single shot blaster with an integrated “laser sight”. It has a very futuristic looking silhouette and I thought I could probably get it done fairly quickly as it’s much smaller than the Strongarm above.
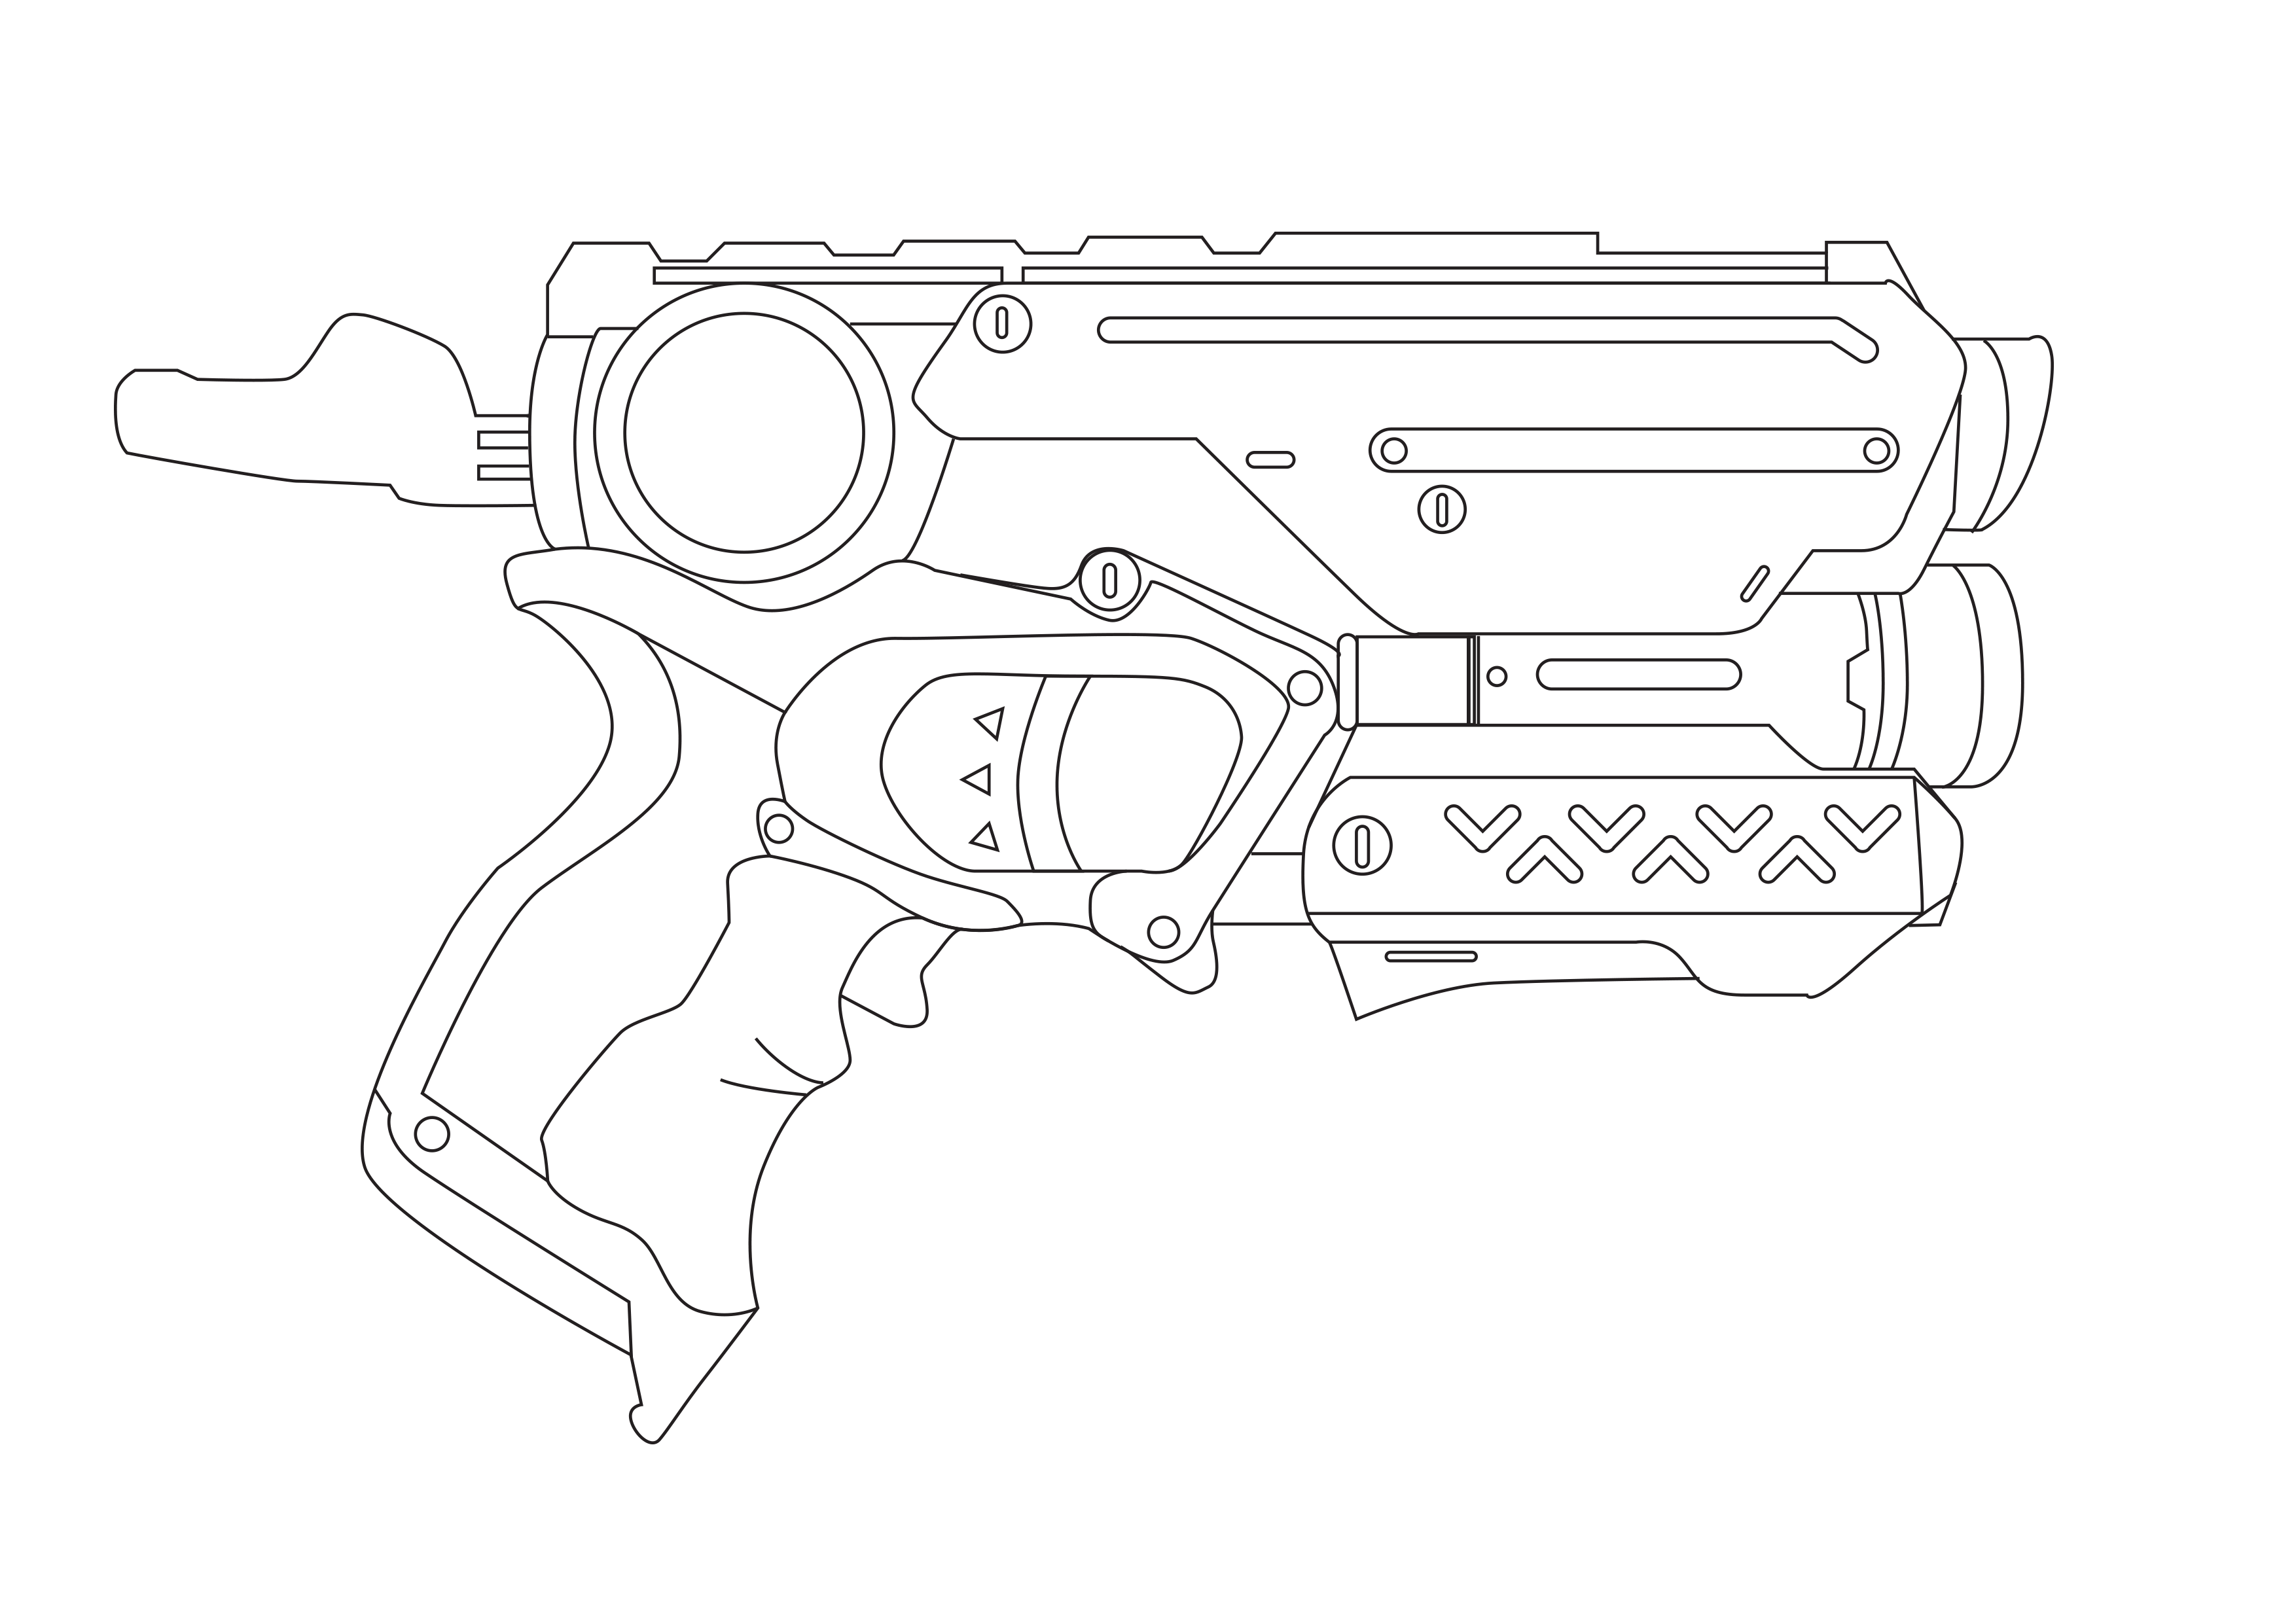 I looked around online for an existing template to work out the colour scheme on. I was unable to find one so I threw one up together in Illustrator. It’s not perfect but it’s good enough fo figuring out a colour scheme. Please feel free to use it if it’s useful to you, the outline image to the right links to an A4 transparent version.
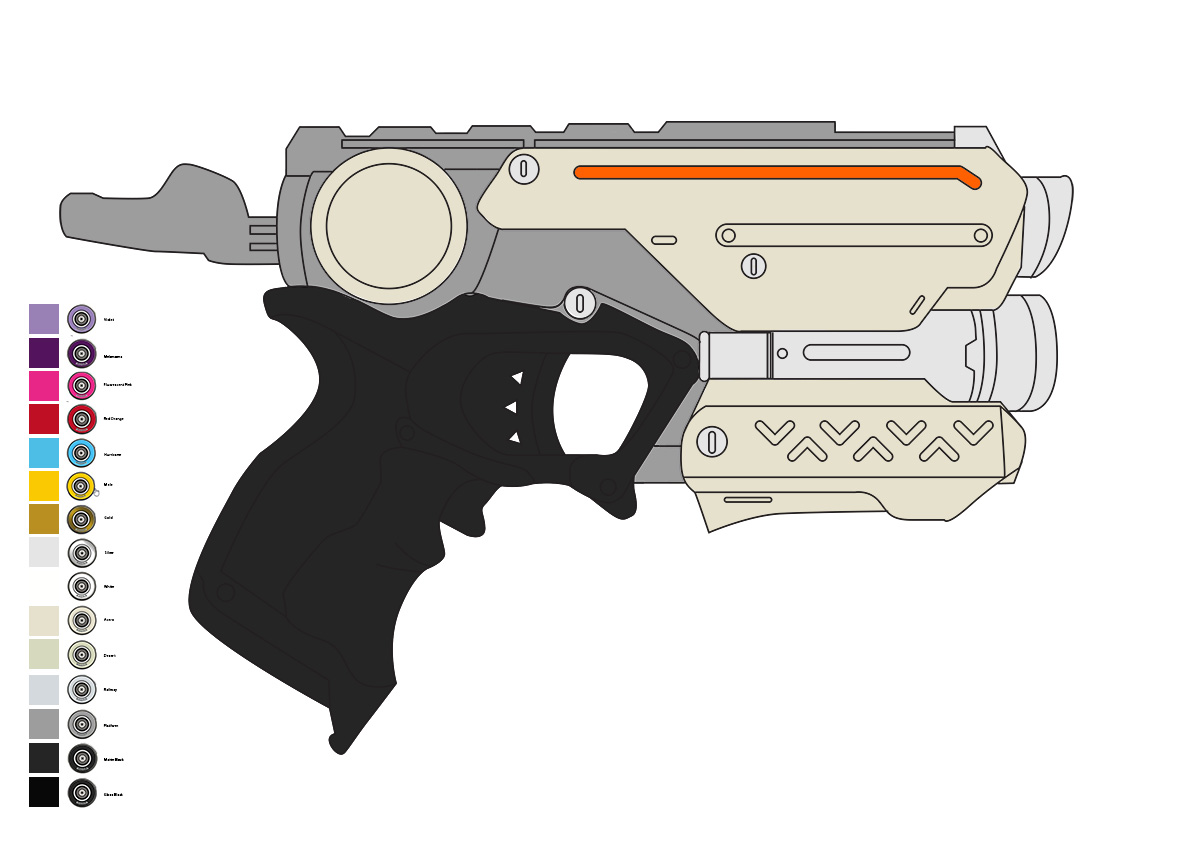 Having bought a few more colours of spray paint I decided to go with a lighter and more muted colour scheme this time to see how that would work out. I also wanted to break up the shapes of the gun a bit so I used the moulding of the gun to separate the sections of colours.
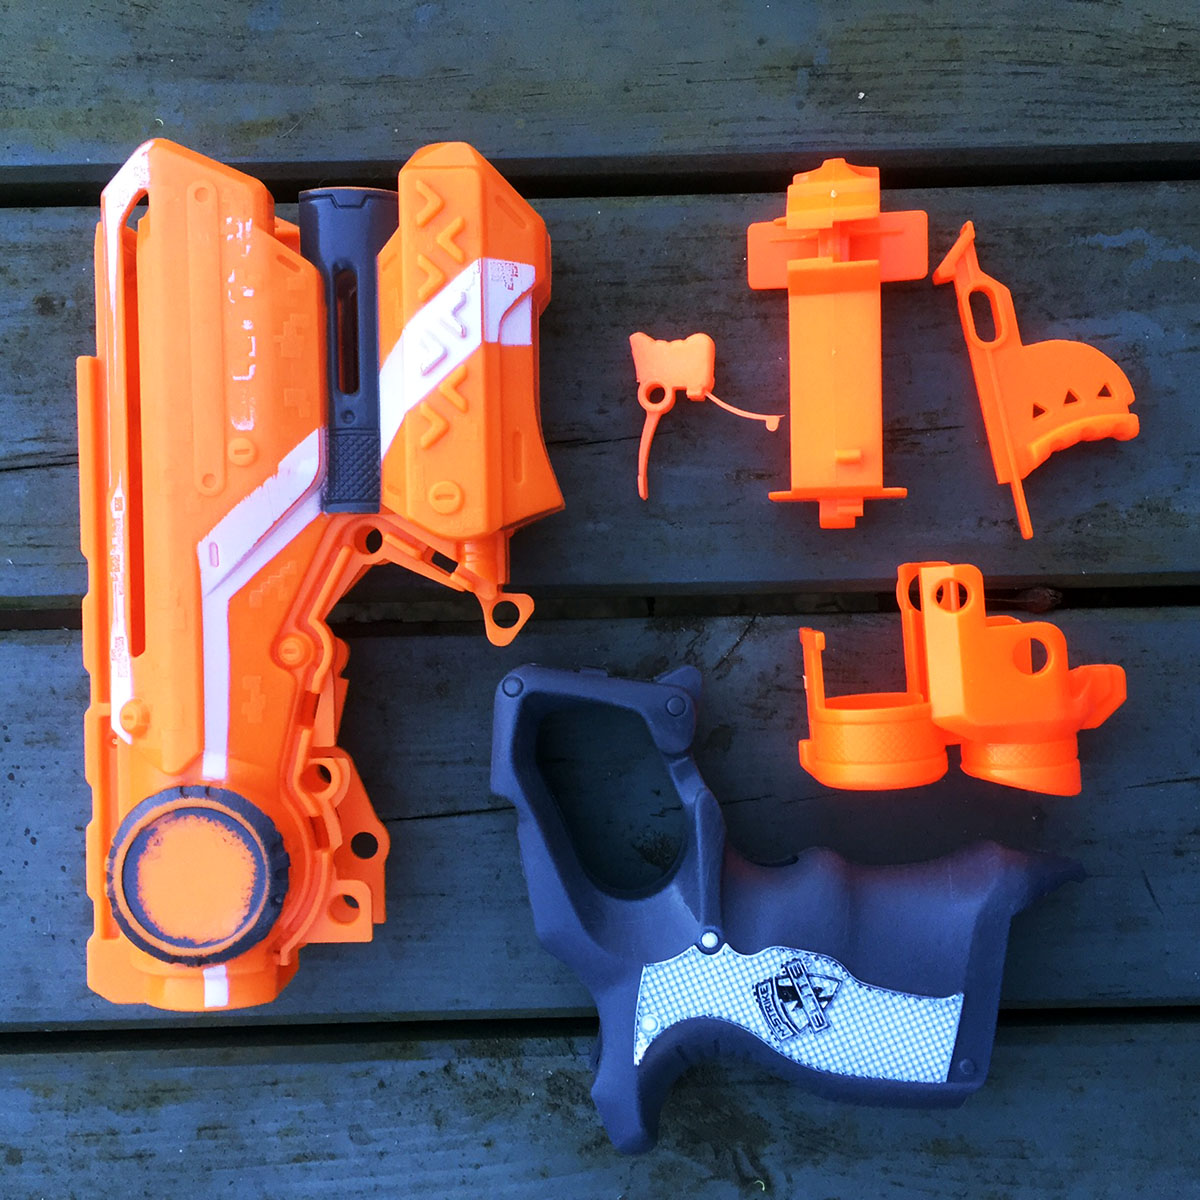 As before I ground off the NERF logo, Firestrike branding and the safety instructions. I used a much lower speed this time and that left me with a lot less sanding to do afterwards. Then I roughed up all the surfaces of the blaster with some wire wool to give the paint something to grip into.
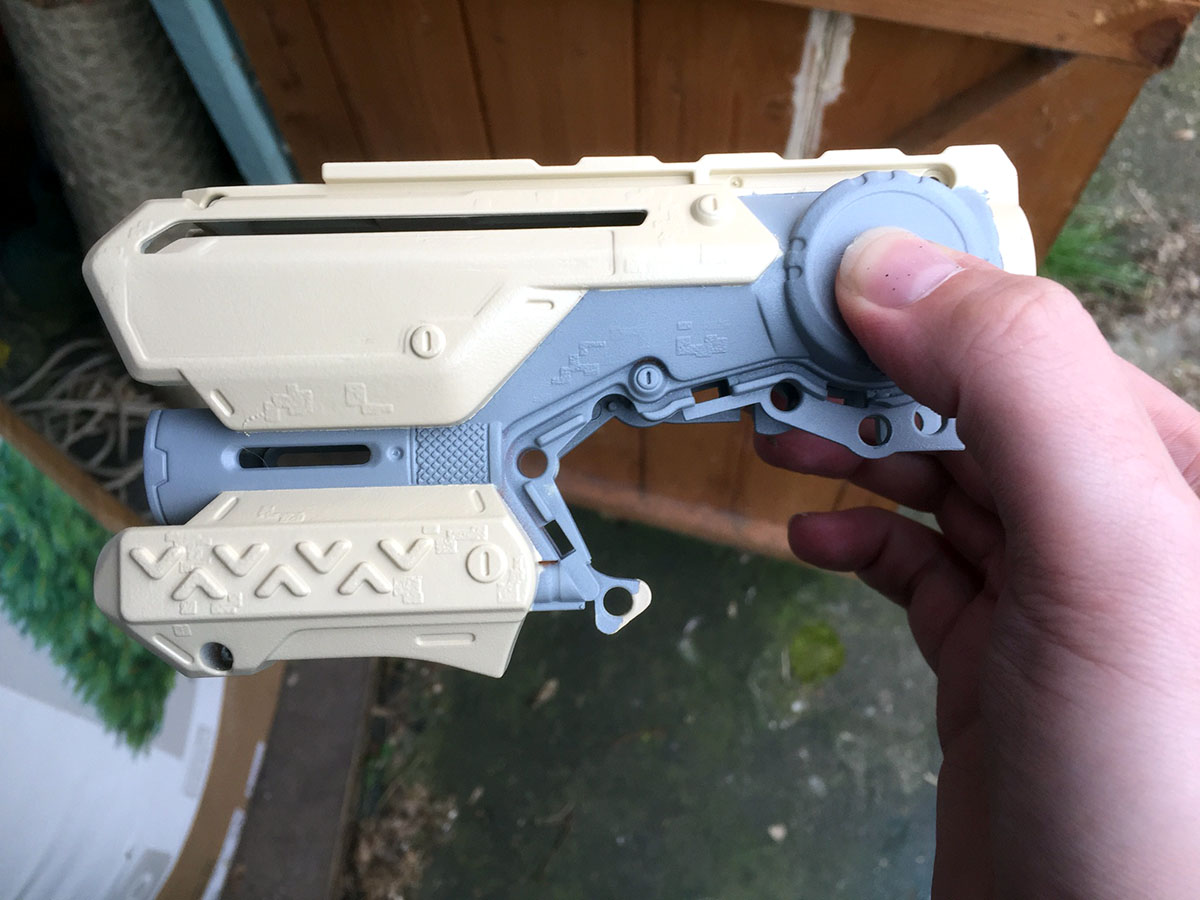 The whole thing got painted with a grey primer and left to dry. Once it was dry I sprayed the whole thing once again with a slightly different shade of grey spray paint. Then the masking began. It took quite a while to cover all of the sections I wanted to stay grey. I used 3M blue painters tape and a scalpel to mask as accurately as I could and then sprayed the ivory coloured sections. When I peeled off the tape I was pretty pleased with the results (and confident I could hide any mistakes with weathering later on). The grip got sprayed matte black and the barrel got sprayed silver.
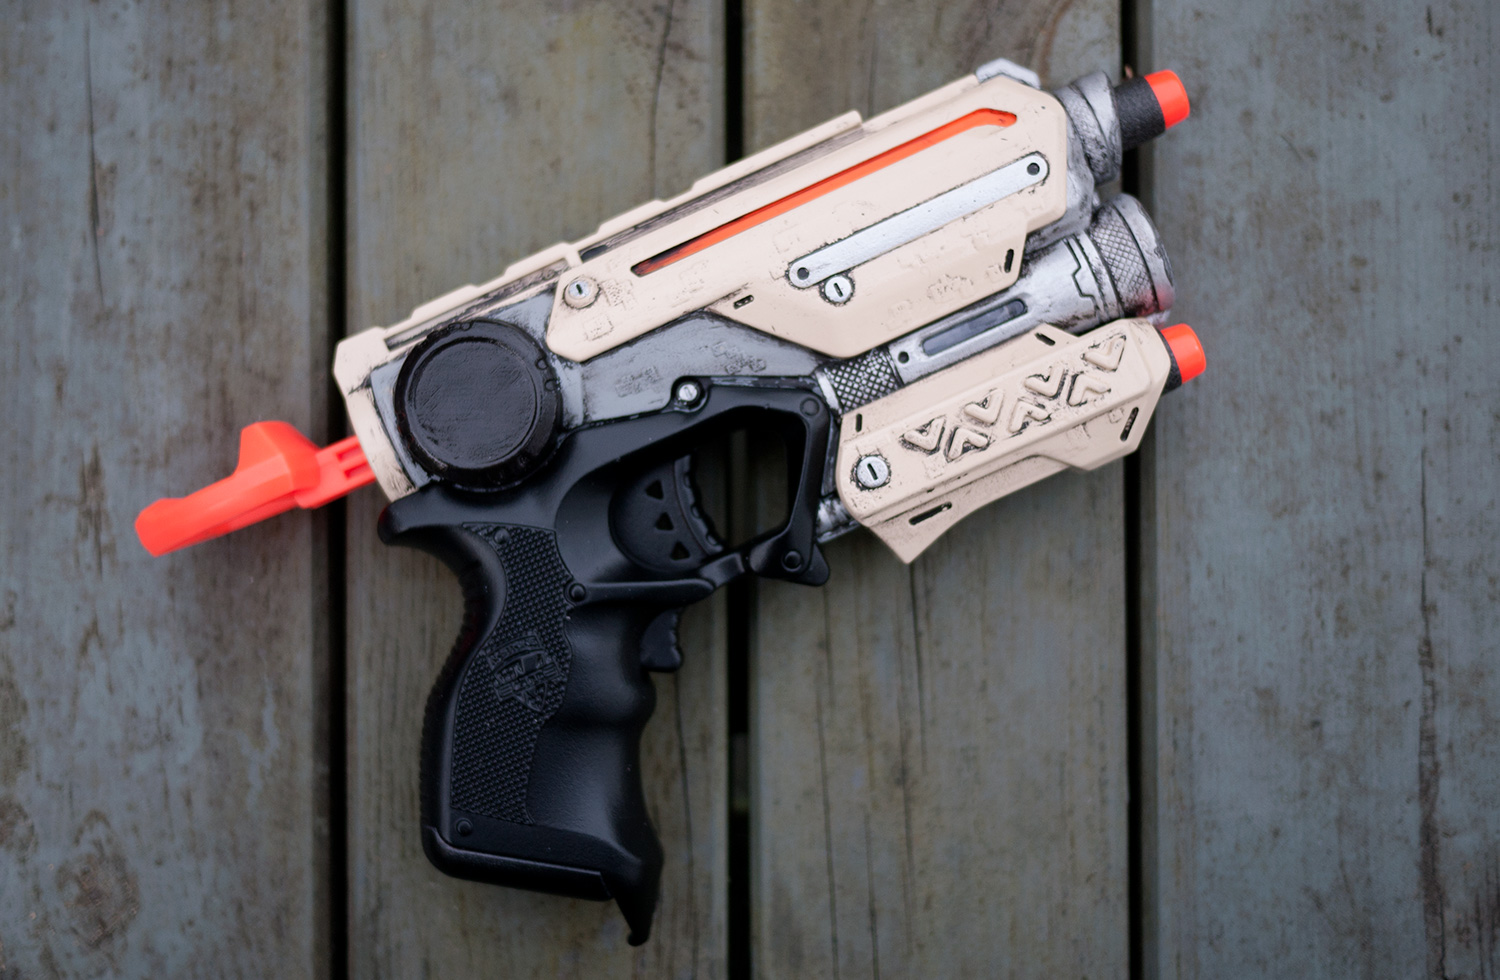
I decided that I didn’t want to mask up the whole thing again to spray they cylinder at the front silver so I painted that in with a brush along with the screws and the plaque. I did the same thing for the black dial above the grip. The handle got a matte clear coat and the rest of it got a gloss clear coat. Then I had to reassemble the blaster and reconnect the wires and laser, again taking lots of pictures before made this a lot easier than it could have been. Next up came the weathering and a final clear coat which left me with this.
…and the rest
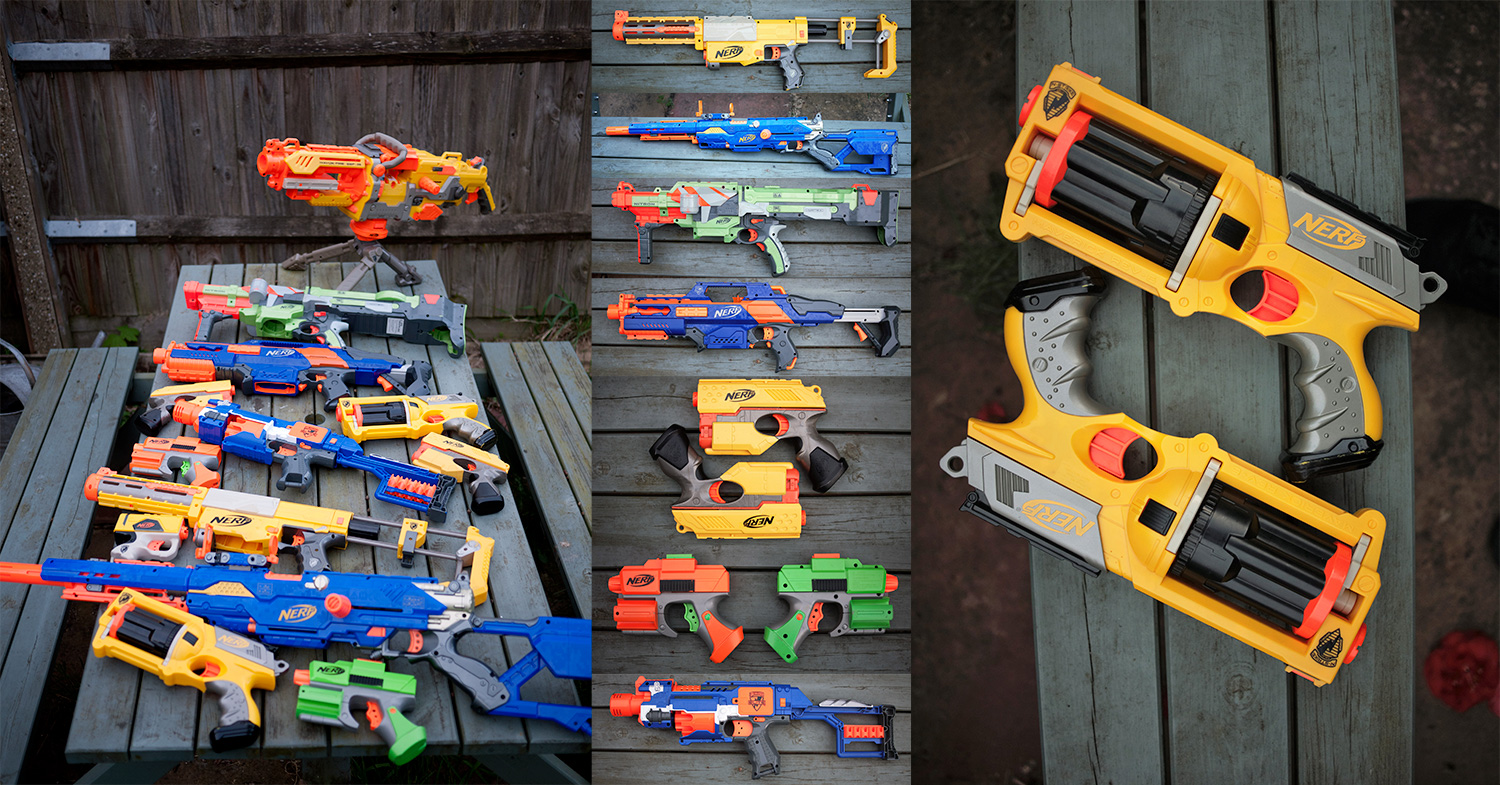
So I got a little carried away and won an eBay auction for someone’s Nerf collection. So now I have thirteen more blasters of varying styles and sizes to work on. I’m sure I’ll post the finished versions online as I get them finished.
2 comments
Shap
11th September 2019 at 1:39 amHow do I Keep the paint from scaling up like you showed?
Ian
14th October 2019 at 12:48 amIt seems to have been a reaction between the primer and paint that I used. I’ve changed primer and never had an issue since. Best to test on some scrap plastic to save having to sand it all off the nerf gun.